


から脱退します。
よろしいですか?
Building Stairs
This is my attempt to explain how to build stairs. While writing this, I realized there is a lot to it that shouldn't be taught, but instead learned through time and experience. Give yourself time to take everything in. Each section builds on the last.Your goal is to remember sections 1-4 (but not 3.5) like the back of your hand through muscle memory. After section 3, the chain becomes much more difficult to build. However, if you make it through every section, the lessons learned here will help you with anything you try in the future.
1: Brief look at stairs.
2: Building 3 columns in the center.
3: Building and using 3 chains with stairs.
3.5: More ways to build columns.
4: Building 4 columns against the wall on the right.
4.5: The Next Window
5: Building 4 columns against the wall on the left.
* If you made it this far, you should be well-prepared to learn sandwich.
6: Building a transition for stairs.
7. Building a proper 7 chain with stairs.
7.5: The Two Color Conflicts.
8. Useful Building Ideas
Game Starts
Build options for the Transition
Two Tails for Stairs
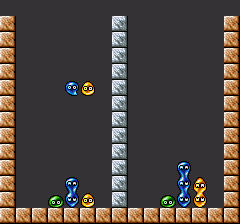
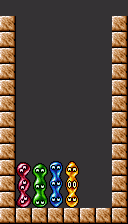
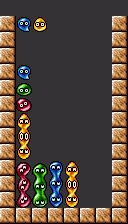
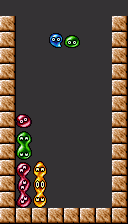
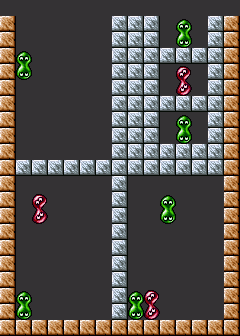
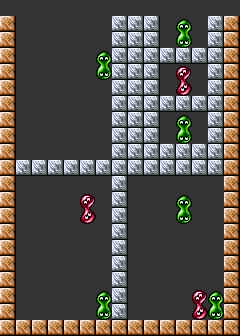
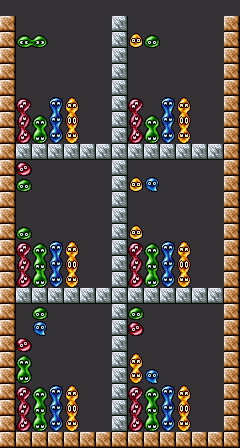
1: Brief look at Stairs.
I hope you followed the advice about learning how to build a chain and recognizing when you extend one in the previous section. Otherwise, you have to learn it here now.
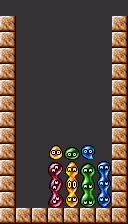
Take a look at the shape. It’s very simple and squeaky clean at a glance, but let’s look a little deeper just to be sure we understand it.
First, you have the columns.
And then you have the pieces above them. Without these, the chain won't work.
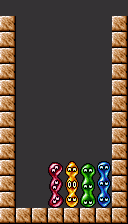
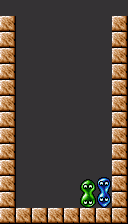
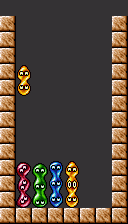
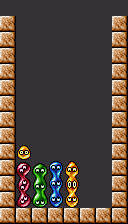
2: Building 3 columns in the center
So if you want to practice stairs, you need to first build the columns. I suggest learning how to build just three columns in the center of the board first.

Practice just this part a lot. You need to develop your muscle memory so that you can focus on learning to turn this into a chain. Any pieces you get that don't help you make the columns can be thrown to the sides. Don't worry about making a messy board right now. It's more important to learn how to build things.
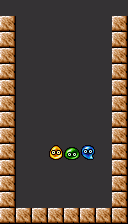
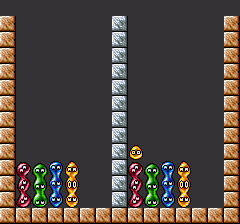
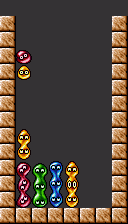
3: Building and using a 3 chain with stairs.
After you learn to build 3 columns, practice turning it into a chain. As soon as you make the 3 chain, use it. Prove to yourself that you made a 3 chain. Again, you need to remember these sections (except for 3.5) like they're the back of your hand through muscle memory. Spend a good amount of time learning this.
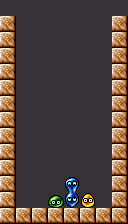
3.5: More ways to build columns
I have no way to know which method you used to build stairs, but I can guess that you did this a lot:
This is good. Now pay very close attention to this one. It's the most important thing you can learn.
I am basically asking you to expand your vision. Every piece you get in this game is two colors (in tsuu mode anyway), so if both of them help you build your chain, take advantage of that. First, recognize the colors that you need. Then use that knowledge to find out if the piece you have can help you in more than one way. Some people understand this right away. Others need time. Please be patient if this doesn't come to you naturally.
There are many uses for pairs once you make the connection. The more ideas you have, the better you become at building anything.
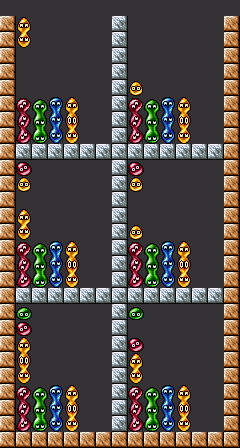
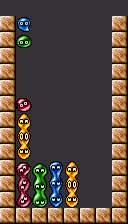
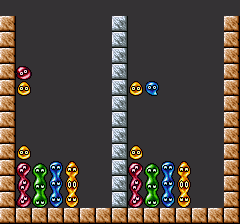
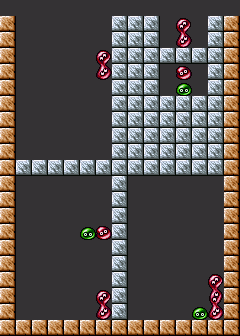
4. Building 4 columns on the right
To help you make the connection, the next step for building stairs will be making a 4th column. The 4th column will be built against the wall on the right.
Now that the wall is involved, here's some advice:
Don't start your staircase against the wall with anything other than a double color (in other words, do this). This will make your life a lot easier.
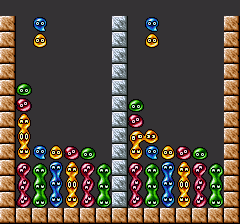
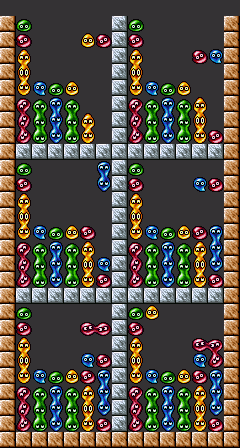
It is at this point that your chain needs to look like the image at the beginning.
In order to do this consistently, you need to be able to use pairs more efficiently.
Of course, it doesn't have to look clean like that.
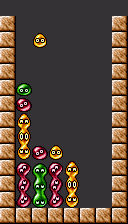
Here are six examples of me building just the 4 columns for stairs:
First three
Second three
(You can slow them down if you need to using the left arrow button on the player)
4.5: The Next Window
This is a more advanced part of the game, but I still want to point out something about it. When you play, the game tells you what the next two pieces you're going to get will be. Take a look at it at the start of your game. For example, what if you start a game and you get two of the same combination of pieces? Did you know you can put them directly against the wall like this?
Remember when I said you should only put a double color against the wall? This also counts. There is another use for it in the beginning of a game, but I'll leave that up to you to figure out on your own for now.
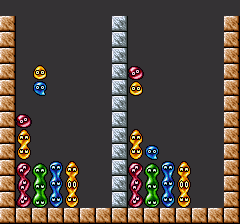
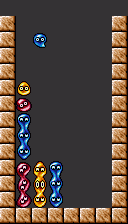
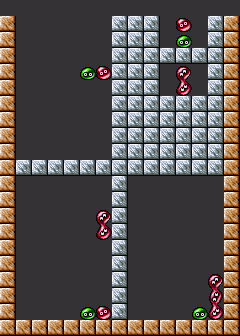
5: Building 4 columns on the left
Now you need to practice these. Again, start your staircase against the wall with a double color. If you weren't doing it before, you especially need to do it now, as it is important for the next section. Building this way will force you to use both colors in your pair when you complete the first column. There is no way around it.
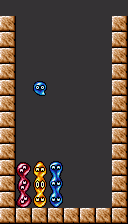
These are your two options shown in gif form. You need to learn how to do both.
If you practiced section 4 a lot, you'll probably notice right away that something's wrong. You can't use the chain. The column against the wall blocks you from using the rest of the chain.
Congratulations. You now reached the part where many people have problems. Why is that? Because now you need to learn how to build a transition.
6. Building a transition for stairs
As always, understanding the previous sections will make learning this part much easier. Are you confident that you should be this far? Good luck learning all of this if you skipped to this part instead.
In gif form
Remember the two possible ways to use column 1 explained in section 5? The image above shows how you can build a transition based on those two options. Like last time, you need to learn both. The option on the left is easier to understand. The option on the right is easier to use once you understand it, but all of its options make it more complicated to learn. Let's look at their parts.
For the option on the left:
First you have the columns. You only need 2 to make the transition, but we've been working with 4 so let's keep doing that.
Now we have a double color. You already learned to place a double color against the wall in a previous section, so this should feel pretty familiar.
For the next part, pay attention to the color underneath the double yellow. It's red. And the double yellow is yellow. So what do you need? A pair that is both yellow and red.
Finally, we need a way to activate the greens in column 2. In order to do that, you need to place a green in column 1 on top of the red.
Fantastic. Now let's see it in action.
Oops. I forgot to add a blue on top of the greens in column 2.
...Yeah, just because you built the transition doesn't mean the rest of your chain magically works now. Remember to fill in the rest of the chain if you want everything to work.
For the option on the right:
As you can see, we have an extra color on top of the reds. This gives us a lot more options.
I'll show you two.
Did you know that regardless of which option you pick, you will eventually have to place a blue in column 2 and a red in column 1? If RNG gives you either of these, you will be fine as long as you knew you could make these moves in the first place! That also means if you get both pieces one after the other, both can contribute to your chain. I'll show you with a gif.
Very nice. Was this confusing for you?
By now, you should know how to extend stairs, so you know you need to place a blue in column 2. Section 4 (and 5 to some extent) was the big grind for trying to figure out how both colors in a pair can help you. Both options make use of this idea.
To complete the chain, you need to finish extending the stairs and be sure to add a green on top (Green is the color in column 2. If your chain uses different colors, the color in column 2 needs to be in column 1. Add that color last. The color directly against the wall, in the example's case, red, needs to be added first).
Be sure to practice this a lot as well. The next section is everything you learned at once.
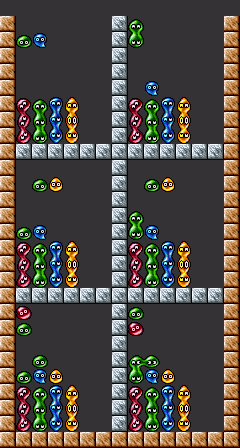
7. Building a proper 7 chain
You may have figured this out while practicing in section 6 like I suggested. If you did, nice job. If not, this is the moment you've been waiting for.
The 7 chain (using both options). You already practiced building stairs on the left, right, and center. You practiced the transition. Now it all comes together here.
And yet we can still learn more. Let's cover the two color conflicts.
7.5: The Two Color Conflicts
The 1-3 Conflict:
Make sure the color in column 1 (red) is not the same as the color in column 3 (red).
The Transition to Column 3 (TR3?) Conflict :
This one is far more dangerous and harder to notice at the same time. The color used for the transition (blue) can't be the same color as column 3 (blue).
The best way to avoid this color conflict is to build column 2 and place a color on top of it as soon as possible. You will naturally avoid adding the wrong color to the transition from there.
Another way would be to build the transition before you build column 3 and make sure column 3 doesn't match.
Both conflicts involve columns 1 and 3, so if you keep that in mind, you'll be fine.
Good luck.
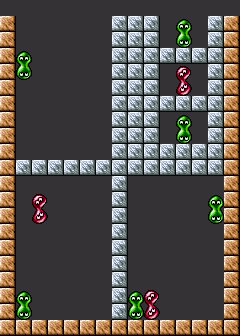
8. Useful Building Ideas
This will just be a section of a lot of helpful things I discover through practice. If you aren't comfortable with sections 1-6, it will be very difficult to put this information to use. Most of it is pretty advanced.
Game starts
Remember the Next Window section where I mentioned the yellow/red + yellow/red pairs at the beginning of the game? Here are a few more worth remembering. All of them are special in that they're better if you start from the right side.
Build on the right side like in the images above. Using this the other way is dangerous. Note that the above shows two different situations, depending on the order of the pieces you get.
This combination of pieces at the start is awful for stairs. You have three options. Each depends on your situation.
Use option 1 (left) if you just want to practice stairs.
Use option 2 (middle) if you know something other than stairs, such as 2-1-1 sandwich.
Use option 3 if you prefer a safer start to stairs. Color conflicts only happen on the transition side (the left). Note that you can only see the first two pieces of your chain, so every time you see two double colors (or the same pair) twice in a row at the start of the game, you have to place it on the right.
It's sad to say, but this (above) is a bad start for stairs. It isn't very consistent. This isn't a problem that's exclusive to the stairs pattern, but it's something to be aware of. At least it was useful for building just 4 columns against the wall.
Build options for the transition
Let's also look at more options in the transition area that weren't covered in section 6. It personally took me a long time to realize this was possible, so if you learn it now, you won't be like me.
Left six gif.
Right six gif.
You don't have to memorize this. I don't have it memorized either. It's better to understand why it's here. Remember. You want both colors in the pair you're holding to be useful.
Two Tails for Stairs
Sometimes RNG. Sometimes fix. Have look.
Left (gif)
Right (gif)
Finally, this is bad for tailing. If you're in a situation where RNG is forcing you to throw pieces at the top of columns 5 and 6, avoid building an L shape (the blues on the right).
更新日時:2020/04/26 03:09
(作成日時:2020/04/19 07:17)
(作成日時:2020/04/19 07:17)
コメント( 0 )
コメントするにはログインが必要です